Introduction
Over the past year water cooling ‘ready’ cases have come along at a steady pace and have now started to evolve into a viable entity in their own right. Not long ago a water cooling ‘ready’ chassis was in reality a case with two holes drilled in the back and that was the extent of it. We at Overclockers Tech embarked on a mini-crusade of-sorts in order to get the manufacturers to produce a TRUE water cooling case that did not cost in the region of £300. If the aforementioned chassis are unable to install at least a 240mm based radiator along with its fans internally then it is simply not water cooling ready. Drilling two holes in the back will not fool review sites and it certainly does not fool the most important element of all and that is the consumer.
 |
It is great to see that these mists are finally starting to part in earnest and some viable products are starting to turn up. Enter the Cosmos SE by Cooler Master which promises at LEAST two water cooling loops erstwhile with a street price of around £155. To make matters more interesting window or now-windowed versions are exactly the same in price.
Before we go any further we wish to explain the difference between our article and the myriad of differing reviews of the same product out there. Our review is more of personal and detailed experience involving a day-to-day build inside of the entitled product. Most review sites will simply post external and internal photos, then do a simple build inside. However we at Overclockers Tech are going beyond this time-honoured review style as we are assembling TWO high specification water cooling loops and commenting our thoughts and feelings as we progress. This allows the consumer to have more in-depth knowledge of the Cosmos SE which will allow the former to make a more informed decision.
We will however be conducting this review in traditional fashion until we reach the internal section and then it will be more of an ‘experience’ rather than a review. So when the aforementioned ‘internal photos’ are shown there will be an absence of fancy white backgrounds, no blurb just what we have experienced personally whilst in this system build.
Company Background
While staying true to its original mission, Cooler Master is responding to transformations in the global industry and adapting to its own rapid growth. It will continue to devote resources to developing more advanced technologies, retaining a spirit of innovation. It will also continue to refine its operations, enhancing efficiency and making the company even more responsive to customer needs and market changes as they arise, efficient, and providing even better service to customers.
Cooler Master will also continue it dedication to creating and helping realize a vision for thermal solutions, retaining its promise to customers to be their best partner.
(http://www.coolermaster.co.uk/contact.php?page_id=2 last accessed 06/11/2013)
Specifications
Boasting some interesting specifications and features the Cosmos SE promises to be truly water cooling capable.
| Model | COS-5000-KKN1 COS-5000-KWN1 (windowed) |
| Available Color | Midnight Black |
| Material | Polymer, steel, aluminum, mesh front bezel, rubber |
| Dimension (W / H / D) | 263.8 x 569.4 x 524.4 mm |
| Weight | 10.8 kg |
| M/B Type | ATX, microATX, Mini-ITX |
| 5.25″ Drive Bay | 3 (exposed) |
| 3.5″ Drive Bay | 8 (hidden) |
| 2.5″ SATA HDD Drive Bay | 18 (hidden; 16 converted from 3.5″ bays) |
| I/O Panel | USB 3.0 x 2, USB 2.0 x 2, Audio In & Out |
| Expansion Slots | 7+2 |
| Cooling System | Top: 120/140mm fan x 2 (one 140mm black fan installed, 1200 RPM, 19 dBA) Front: 120mm blue LED fan x 2 (installed; with LED on/off), or 140mm fan x 1 (optional) Rear: 120mm fan x 1 (installed, 1200 RPM, 17 dBA) Side: 120/140mm fan x 1 (optional) HDD cage: 120mm fan x 2 (optional) |
| Power Supply | Standard ATX PS2 |
| Maximum Compatibility | VGA card length: with HDD bracket: 276mm / 10.9 inch without HDD bracket: 395mm / 15.5 inch CPU cooler height: 175mm / 6.9 inch |
Features
- Superior liquid cooling support: 120, 240, 280 and 360mm radiator; supports 3 radiators at once – 120+280+360mm
- Supports up to 8 fans, including 4 installed fans – two front 120mm blue LED fans with LED on/off control, one top 140mm fan and one rear 120mm fan
- Dual Super Speed USB 3.0
- Great expandability with the support of up to 8 HDDs/18 SSDs
- Supports all high-end VGAs up to 395mm/15.5 inches long and CPU coolers up to 175mm/6.9 inches tall
- Large cable management space – 34mm
- Multiple removable dust filters (top, front, bottom, side panel) for improved system maintenance
- Supercar inspired design with aluminum curve handles
Water cooling radiator support and Cooler Master actually specify the radiator sizes, well I guess Overclockers Tech will put that to the test.
Packaging
The Cooler Master Cosmos SE comes in a slightly smaller box than its larger, brother the ‘Cosmos II’ and the packaging itself sports the usual ‘Cooler Master’ themed artwork. The front of the box displays an extra-large side window and for a time we wondered why the aforementioned company made this a major feature, as surely all good enthusiast cases come with a window right?
 |
 |
 |
 |
Upon reading the specifications at the back of packaging one can discern the reason for highlighting the extra-large window and this is due to one of the major features of the COSMOS SE and that is the ability to install a radiator in the front drive bays. This then explains the need for a large window indeed.
The side panel again shows Cooler Master’s colour choice, along with the specifications, which mirror those on the back of the box.
 |
 |
Opening the box shows the usual standard fair which is two heavy duty styrofoam end pieces along with a plastic bag in order to prevent scratches and bumps during transportation. Now that we have the basic packaging covered, let us move on to the juicy bits shall we and that would be the external looks.
External Looks
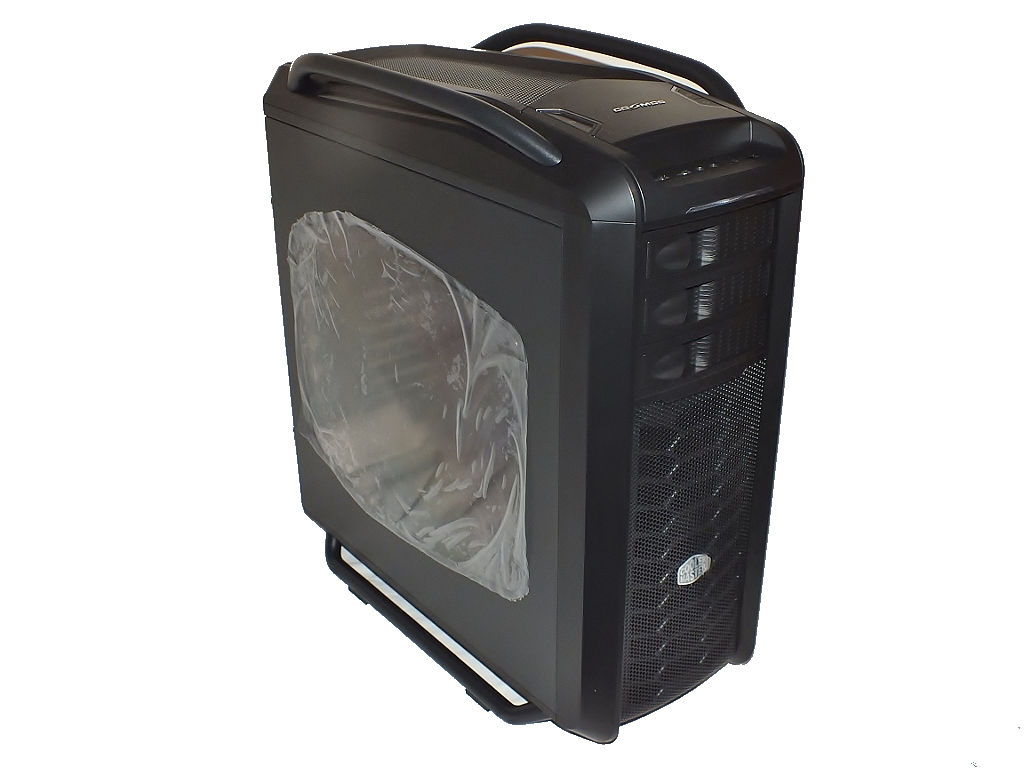
Cooler Master have billed the Cosmos SE as being inspired by a race car design, however we at the ‘Overclockers Tech towers’ see things differently. We see that the Cosmos SE has more looks that are akin to that of a ‘CYBERMAN’ from Doctor Who, than that of a sports car. The chassis two upward flowing handles does indeed lend credence to this thought, which reminds of a rather interesting mod we can alter do to this case.
The general build of the Cosmos SE looks to be one of quality,albeit one of steel and plastic.
 |
 |
 |
 |
Let us start with the front panel and then work our way around the system from there shall we?
The previously mentioned panel sports three 5.25 inch bays, which is more than enough for most situations, particularly with the fact that optical bays are starting to the way of the Dodo. This panel is completely removable, in order to obtain access to the inner workings (more on this later) of the chassis.
 |
 |
 |
 |
Beneath the front grill there are two 120mm-based Cooler Master fans, of which are of the Blue-Led variety. Here at OCT we have an issue with Blue LEDS’ as we feel that they have been used so much that they have become a cliché now. Moving on to the I/O panel and we see two USB ports of the 2.0 variety and a further two for USB 3.0 speeds. In the centre of this are the usual microphone and headphone sockets.
 |
 |
 |
 |
Going further afield we encounter the main power and reset buttons. As one can tell from the photos they also emit a blue glow, whilst above the latter we find the LED on/off switch for the two front fans which is very handy as not everyone likes the glow of Blue LED’s.
Moving on to the top grill we get a feeling of that the surface and styling is ultra-slick and it is this section we pay most attention (internally) when we review as this is traditionally where a water cooling radiator would be placed.
 |
 |
 |
 |
The back of the case where it meets the top cover has a thumbscrew, this is in order for the consumer to gain quick and easy access to the fans and we shall investigate this more later in the review. Present at the back of the case are seven PCI-E slots which gives an indication that this case is only compatible with the ATX standard only of which is the largest it can accommodate. Finally there is a 120mm non-LED fan to serve as a point of hot-air extraction.
The power supply hole at the bottom has screw holes to accommodate both positions of the fan that either sucks cold air in from the outside or from the internal resources of the chassis.
 |
 |
 |
 |
On the lower panel and we really appreciate Cooler master doing this are two removable filters, one to prevent dust from entering the power supply area, the other the same but for hard drives.
The main window in the first side panel is rather large, more so than normal which is in order for us to get a glimpse of any radiators or water cooling kit that has been placed within the front of the case. To be honest the side panel looks a little fragile, due to the sheer size of the window, however let us see how it goes when we open the chassis up shall we?
 |
 |
 |
 |
The second side panel looks to be a much stronger and durable than the first one due to the lack of a window section.
To sum up on this build, the quality for the price of around £140.00 is there, however some purists will complain with the over-use of a polymer-based material rather than that of Aluminium. Now having said the former we believe that is what one can expect for the price.
These last photos are more shots of the case, in order to bring a more complete overview.
 |
 |
 |
 |
There you go with the external views, all in all a well built case. Next we have a ‘twist in the tale’ of this review, or rather ‘experience’ Keeping on reading to find out what.
The Cosmos SE Experience
From here on things will be a little different from your ‘run of the mill’ article. Whilst at present there are countless reviews on this case already there seems to be lacking an article written with the water cooling enthusiast in mind. Here at Overclockers Tech we will attempt to address this issue by assembling a loop or two within the case as then one can correctly inform the reader on any advantages or issues encountered within the build.
However here in this build, we have had to assemble the system with only the products we have in hand and available as our budget was limited. Having said this the Power supply and Motherboard used were kindly donated by Coolermaster and BIOSTAR.
PSU= CoolerMaster V1000
Motherboard= Biostar Z87-HIFI-3D
Essentially the theme of this build was designed around the pre-existing scheme of the Cooler Master chassis and that of the motherboard colour palette.
Day one
Side panel is removed by the usual two thumbscrews and straight away we head towards the internal 3.5 inch bays.
 |
 |
 |
 |
Once all the caddies are out (including the ones that are almost at the floor of the case we turn our attention to the screws on the panels. Each of the latter have four of the former holding in each panel, with these being three per side.
 |
 |
 |
 |
There are more mounting panels for when the drives are in a regular orientation, along with the bundled two blue LED fans.
 |
 |
 |
 |
The last two images above show the removal of the dedicated 2.5 inch drive caddy, of which can be removed by taking out the four screws at the bottom of the case.
The images below show show the amount of panels that must be removed in order to fit a 360mm radiator
 |
 |
 |
 |
All in all a easy removal of all the extra panels that must be removed to fit a variety of radiators. That is it for day one, day two will explore what type(s) of radiator that can be used within the front section of the case.
Day Two
Welcome to day two of our Coolermaster Cosmos SE experience. Today we are going to examine how the radiators can be installed and if they can then what size can be utilised?
Here we take advantage of the fact that we have an old Thermochill PA 120.3 radiator with the old 25mm fan spacing. Now in sooth we do not expect this to either physically fit inside the case nor have the correct mounting for such an old style radiator.
 |
 |
 |
 |
The lower left photo shows the mounting mechanism available for the Cosmos SE and soon we shall see if this will work. To make the reader aware that we really are making life hard for the Cosmos SE as the Thermochill radiator employs a non-standard fan spacing and as such will be a challenge to mount.
 |
 |
 |
 |
As shown above we painted the Thermochill radiator in similar colour theme to that of the Biostar Z87 HIFI 3D motherboard, so as to enable a common colour scheme throughout this build.
 |
 |
 |
 |
The images above show that the Comos SE can accommodate any type of radiator up to and including the massive Thermochill PA120-3. It is able to perform this feat by the use of what we call a ‘Radiator Bridge’ and thus it can adjust for a legion of differing configurations. The aforementioned ‘bridge’ comes with many screws, that consist of mounting the fans onto radiator or the bridge and the latter onto the case. However here we encounter an issue, the long screws that are designed to go through the bridge, fan and then into the radiator are of only the 6/32 variety and this is a major issue. Fan mounts on radiators come in a myriad of differing types, namely; 6/32 screw and self-tap, M3 and M4 but yet CoolerMaster have only seen fit to include 6/32? We at Overclockers Tech have gotten around this issue by mounting the fan onto the radiator and then as an additional screw utilise a 5mm self tapping type to mount the fans and by extension the radiator onto the bridge. We feel that this is an issue that they need to address.
Now that all the drive bays have been taken up by the radiator, then one can be forgiven for thinking there is no longer any space for a HDD or SSD (Hard Disk and Solid State Drives) drive right? Well Coolermaster have addressed this situation by mounting the drives out of sight on the other side, but here is where we encounter an issue. As one can see by the first photo below, the drive is mounted in such a way as to as to prevent a right-angled SATA connector from attaching to the drive. One could say a a straight SATA cable will cure this issue, however if one thinks deeper on this issue then we can deduce that all medium to high specification motherboards all come with right-angled connectors and this would would need to purchase separate straight leads.
 |
 |
 |
 |
Remember on the external tour we noticed the thumbscrew on the rear panel, which allows the consumer to remove the top panel? This is a great feature as in theory it allows the purchaser of this product to install the fans in this section and the radiator into the main chassis. The last photo (with a section ringed in red) where fan wires can be routed through to the main sections.
The position of the front panel audio connector on the motherboard is placed in such away as to force the cable from the panel to trail right over the latter, thus possibly blocking airflow. I think the problem is more likely two fold; Coolermaster For not making the I/O cable long enough to allow it to route through the cable management system and second the issue with Biostar with regards to placement of the connector.
 |
 |
 |
 |
Since we do not require the above-mentioned cable then it would be prudent to remove it altogether. Coolermaster provide this service by allowing the front I/O panel to be easily removed by two screws, (shown in the top right photo) which allows the consumer to gain easy-access to the printed circuit board.
Below we see the printed circuit board itself and the LED wires which can be (if one has similar tastes to us, ID-EST Hates BLUE LED’s with a passion) modified.
 |
 |
Well that is it for day two, day three covers the last radiator mounting and we finally see this beast come together.
Day Three
This is an interesting day as we finally complete that radiator mounting and see this monster of a chassis complete.
Let us now move on to the top radiator and that in ‘day two’ we found out that the top polymer panel can be removed by a thumbscrew which allows access to a recessed area where fans can be installed. We also discovered that the radiator can be installed in the central chassis, thus in theory allowing for a extra thick radiator to be installed. However let us put this to the test shall we?
However let us be prudent first and install the CPU water block and therefore we are better able to judge the amount of room needed for the radiator.
Here we have used and modified an old XSPC Rasa block for this purpose.
 |
 |
 |
 |
Here we did a little modification in order for the water block to fit the blue theme that seems to be used throughout the chassis and motherboard products.
 |
 |
The above images show the thermal paste we use as STANDARD (Innovation Cooling’s IC-Diamond) on all our builds and testing procedures, as we feel not only is it the best performing but the most reliable compound too.
The last photo shows the water block finally installed.
Below shows that the fan and radiator and radiator has been mounted, though here we encounter an issue that is two-fold, first is again Coolermaster have assumed that all radiators have 6/32 fan mounting and secondly they have not provided screws at differing lengths according to the DTF (Distance to Fins) of the aforementioned radiator. As we all know though DTF can vary from model and from manufacturer and we feel that is is a major oversight from Coolermaster as anyone assembling their ‘rig’ in this manner would puncture their radiator as a result. A solution around this is to provide ‘spacing washers’ in order to compensate for the extra long (such as how we have employed below) screws.
 |
 |
 |
 |
he next series of photos show the clearance level between the radiator and the MOSFET heatsink on the motherboard and as one can see we could encounter issues of thicker radiators being cable to fit. However we have utilised an XSPC RS 240MM radiator of which can be installed comfortably.
 |
 |
Obviously before assembly of pumps and ‘piping up’ the system we leak-tested all radiators and equipment before assembly and before the radiators and block were spray painted.
Here we have obviously used the rather excellent Coolermaster V1000 PSU in order to fit in with the theme of the build.
 |
 |
 |
The above photos show the piping up of the system along with a ‘suggestion’ rather than an issue. What would be prudent of Coolermaster is to manufacture a converter that turns a 120mm fan hole into a 2.5 or 2.5″ inch bay (as shown in the last photo above) in order to allow the mounting of drives or water cooling pumps.
We do feel that if we did not use 1/2 inch inner diameter tubing and instead employed the 3/8 inch variety then we would have been able to install TWO separate loops.
Finally apart from memory installation and filling the loop with water we are now complete.
 |
Wow it has been an exciting trip with the Coolermaster COSMOS SE case and we have enjoyed it every step of the way, so now let us move on with the conclusion.
Conclusion
We have had a lot of fun reviewing this case and indeed it has been an epic undertaking. In order to give the Cosmos SE full credit, writing an article when either testing in an air cooled environment or a all-in-one water cooling kit is not doing the reader or the manufacturer any justice. This is why we at Overclockers Tech go full-hog on any chassis marketed as water cooling compatible as only then can one fully test on what is going on. The chassis itself is a pleasure to work with and has taught us some (of which will mentioned later) lessons and indeed is water cooling ready as (albeit with a few quirks) as Coolermaster claim. The cable management is second -to-none for a case priced at around £145 GBP including taxes and in general the Cosmos SE is highly configurable.
However here and for the reason that we tested the chassis in a thorough manner have we encountered a few issues, with those being the issue of not being able to fit a right-angled SATA connector when the drive spaces behind the motherboard tray are utilised and the issue with the radiator mounting screws. We also feel that more clearance should have been designed into the top of the case that allows for a 55mm thick radiator to be installed.
Having said the bad news above, these issues can be readily resolved by the end-user with a little common-sense and foresight. This said we feel that this is a very good quality case and should be enough radiator mounting space for most of the ardent cooling enthusiasts out there.
Though we made life hard for ourselves by using this radiator we do feel that it is to the credit of Coolermaster that the COSMOS SE can accommodate both 15 and 25mm based 360mm radiators.
If the reader of this article has an old THERMOCHILL PA 120.3 radiator then help is at hand as this product will support it, as well as more modern radiators.
Lessons we have learned whilst using this case?
- We made life hard for ourselves by using a (but it allows us to really show how good the COSMOS SE is ) Thermochill PA120.3
- Employing 1/2 inch Inner Diameter tubing is too much for a case this size and if we used thinner tubing then two separate loops could have been installed within this Coolermaster COSMOS SE.
Pros:
- Excellent space for water cooling
- Great at air cooling
- Highly configurable
- Some original ideas such as SSD mounting (but see cons)
- Built exceptionally well.
- Able to even fit the largest of 360mm based radiators
- Front panel can employ both 15 and 25mm spacing radiators.
- Wire management is well conceived.
Cons:
- Need more than 6/32 screws to mount the front radiator
- The same again for the top panel, with the addition of installing ‘spacers’ to allow for radiators with differing DTF (Distance to Fins)
- Motherboard tray mounted SSD’S cannot use a right-angled SATA connection.
- Should come with some 120mm fan to 3.5″ or 2.5″ converters so even if all the bays are taken up by the front radiator then one can get them all back by using this device.
All in all the Coolermaster COSMOS SE does exactly what it says on the ‘tin’, albeit with a few quirks. It is an excellent mid-ranged water cooled capable chassis and capable of much, but just a few things could have been thought out in more detail. Overclockers Tech are proud to announce a 8.4 out of ten and therefore a silver award.
We like to say thank you to the following companies that gave products to either test or to review.
Coolermaster
MAYHEMS
PRIMOCHILL
MOD-SMART
BIOSTAR
INNOVATION COOLING
 |
author:
Gilgamesh
 |


 Posted in
