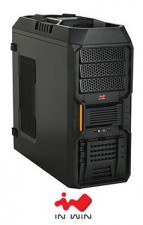
 In Win recently released an updated version of their popular BUC chassis, this time calling it the BUC 101. In Win has made a big push as of late to become a big part of the computer enthusiast market, you need look no further than their Retail Web Site to get an idea of the enthusiast cases and power supplies they offer today. Once known mostly for their OEM products, it’s safe to say In Win is well on their way to becoming much more. Read on as we explore the BUC 101, learn what improvements have been made since the original BUC chassis, and if it deserves consideration for your next system build or upgrade.
About In Win
IN-WIN Development Inc., an ISO 9001 manufacturer of professional computer chassis, power supplies and digital storage devices, is the leading provider of enclosure solutions to system integrators worldwide. Founded in 1985, IN-WIN provides high quality chassis that conform to all safety regulations, as well as unsurpassed customer service.
In Win was well trained to become a top-notch manufacturer of core technology to enhance internal core competence to meet what customer and market needs constantly. Top Management has been executed four major elements to reach our growing goal: Innovation, Service, Speed, Value, Safety, Warmth, Faithful, Diligence in order to remain our leading edge position and differentiate with other players.
Lets start off by having a look at the features and specifications of the In WIn BUC 101. At first glance it appears In Win has done their homework and packed the unit with a lot of unique features.
Features
- Supports High-End Graphics Cards up to 300mm/11.8″
- 3.5″/2.5″ HDD Brackets Which Prevent Vibrations and Lower Noise Levels
- Two USB 3.0 Connections at Top of Case (MB Header Connection)
- Top Tray SATA HDD Easy Access Design
- Tool-Free Design
- Removable Dust Filters
- Excellent Cooling Performance
- Cable Routing Space
- Large CPU Cooler Access Hole
- Eject Button to Easily Remove Top Tray SATA HDD
Specifictions
| Product Name | BUC 101 |
| Material | SECC Steel |
| M/B Form Factor | ATX/Micro-ATX |
| External Drive Bay | 5.25 x 3 3.5 x 1 |
| Internal Drive Bay | 3.5 X 5 or 2.5 X 5 |
| Front Ports | USB 2.0 X 2 HD/AC97 Audio |
| Top Ports | USB 3.0 X 2 3.5/2.5 SATA HDD EZ-Swap X 1 |
| Power Supply | ATX12V, PS2 |
| I/O Expansion Slots | PCI-E/PCI/AGP Slot X 7 |
| Thermal Solution | Front 120mm X 1 Rear 120mm X 1 Top 120mm X 1 Side 120mm X 2 (Optional) Water Cooling Hole Ready Magnetic Air Filter |
| Dimensions (HXWXD) | 496X200X508mm 19.5X7.9X20 Inch |
| Color | Black |
Turning our attention to the packaging we’ll first have a look at the box the In Win Buc 101 is housed in. Decked out with large pictures of the chassis, the front and back of the box display views of the front, left side and top of the BUC 101. Small icons depict some of the features listed above on the front of the box, and the rear has a close-up view of the EZ-Swap Top Bay area.
The two box sides list the specifications and features of the BUC 101 as shown in the list above. The box top is simply branded with an In Win logo and the BUC 101 graphic.
Once the box is opened you can see the heavy foam blocks used to protect the case while in transit, and protect they did, as the case arrived in perfect condition. Removing the BUC 101 from the box reveals a better look at the foam blocks and the clear plastic wrap used to protect the finish of the case.
With the blocks and clear plastic wrap removed we found the multilingual users manual and had our first look at the BUC 101!
 |
 |
 |
 |
 |
 |
 |
 |
 |
|
Next we will explore the exterior of the In Win BUC 101……
The matt black finish applied to the exterior of the In Win BUC 101 looks very nice and the matt texture prevents unsightly finger prints. Beginning at the bottom front of the case we see a “trap door” so to speak, which when lowered exposes the first of three included 120mm fans that are part oft he features of the In WIn BUC. The front fan has a filter that is easily removed by releasing the tab at the top of the door and lowering it. Once the door is lowered and the filter is removed you have access to the fan itself which can be removed through the front if desired. Just above the fan area is a pair of USB 2.0 connections and the standard mic/headphone jack.
Moving upward the next section is where you find the power and reset buttons, reset on the left and power on the right. Also notice the orange and blue accent strips on each site of this area. The blue strip glows when power is turned on and the orange will illuminate with HDD activity. The light for the accent strips is provided by a small LED bulb attached to the steel frame behind the front panel. This is a pretty unique design in the fact that the accent strips light up without wires being attached to the front panel itself, making the removal of the front panel a painless operation. The area between the accent strips is simply a vented area allowing for additional air flow.
Finally at the top of the front area is where you see the three external 5.25 bays and the single external 3.5 bay.
 |
 |
 |
 |
The right side of the In Win BUC 101 has no ventilation or designs applied to the metal stamping. It does feature two quick release side panel latches which make removing the panel extremely easy. All that need be done to remove a side panel is to grab the back of a latch, release it from the panel, and slide the panel back and off.
 |
 |
The left side panel has a large mesh area at the rear most section which facilitates the installation of an additional two 120mm fans (optional). The left side panel filter is another of the BUC 101′s unique features. By use of two magnetic strips attached to the filter you simply use it as an overlay to cover the mesh area on the panel. The intention is to use the filer on the outside of the panel but it will function fine if you prefer to mount it on the inside of the panel.
The left panel uses the same quick release latches as the right side and also features a cutout for the pad lock eyelet to be pushed through from the inside of the case. Both the left and right panels are also attachable with screws if one wishes to even further secure the panels to the chassis.
 |
 |
 |
|
At the rear of the BUC 101 we see that In Win has utilized a bottom mount PSU design which seems to be the norm now days for chassis manufacturers. Above the PSU area you can see the seven vented PCI expansion slot covers and another vented area next to that for even more ventilation. At the top is where the I/O shield opening is located and next to that is another included 120mm exhaust fan. There are also two rubber grommet holes for a water cooling system tubes to pass through.
 |
 |
 |
 |
At the top of the In Win BUC 101 is where you find the majority of the new and unique features this case has to offer. The EZ-Swap Dock features a padded area to lay a hard drive on and a quick disconnect button for when you want to remove the drive. Also included is a hard plastic cover for the SATA drive connection points which will keep them from being damaged when not in use. To use the EZ-Swap Dock you simply lay a drive on the pad with the connection points lined up and slide it back until it is securely attached. When you want to remove a drive just press the release button and your drive will be slid forward and released from the connection points.
 |
 |
 |
 |
Just behind the EZ-Swap Dock is where the two USB 3.0 connections are located. The connectors are covered by a pliable rubber cover that is easy to remove and will do a good job in keeping dust and foreign objects from getting inside. If you are the type that keeps your computer on the floor or beneath your desktop you will really enjoy the location of both the SATA EZ-Swap Dock and the USB 3.0 connectors.
Yet another included 120mm fan can be found at the back of the top panel. This fan is complete with a filter, and much like the front case fan the filter and fan itself are accessed by releasing a tab and opening a door. The more we used this tab/door design the more we came to like it as there is no need to remove complete panels to access the filters or the fans. Kudos to In Win for this design!
 |
 |
 |
 |
Our exterior tour of the In Win BUC 101 concludes with a look at the bottom area of the case. The front area has two round plastic feet and the rear area utilizes a molded plastic apparatus which doubles as a foot and filter retainer. The power supply filter is easily removable by sliding it out the rear, making for an easy filter cleaning experience. We don’t normally like to see hard plastic used for feet as they can damage the surface you place your computer on. We would have liked to see some sort of rubber cushion implemented here to both protect a surface and to aid in the anti vibration qualities of the chassis.
 |
 |
Continue reading as we explore in internal area of the In Win BUC 101……
The BUC 101 has a black painted interior and is decked out with yellow accents courtesy of the HDD trays, the 5.25 drive locks and the expansion card locking mechanisms. Immediately noticeable when removing the left side panel is the large opening provided for easy access to the back side of a CPU cooler or water block. There is also a box tied to the inside which houses the accessory pack. Inside the accessory pack you will find the following:
- Three bags of various screws for attaching the motherboard and any drives you may have to install. The 3.5 HDD screws accept rubber grommets to hold vibrations to a minimum.
- Case Speaker
- Two 3-pin to Molex fan adapters
- One PCI slot cover
- Black wire ties
The front panel wiring is similar to what you find on almost any chassis except for the Power On LED connection, it supports both the two pin and three pin design. The EZ-Swap SATA HDD wiring is also present and ready to be plugged into a motherboard’s SATA connection that supports hot swapping. The USB 3.0 wiring is designed to be plugged into a motherboard header which does away with the need to route a cable out the rear of the case to access a USB 3.0 port at the back of the motherboard. There are also two USB 2.0 cable leads for those of you who do not yet own a motherboard with USB 3.0 capabilities.
 |
 |
 |
 |
The cable management features included in the BUC 101 are plentiful and well thought out. If you have read some of my other case reviews you know one of my pet peeves is the lack of room between the back side of the motherboard tray and the right side panel. The BUC 101 has addressed this and provides more than ample space to run wiring behind the motherboard tray. There are also two good size holes forward of the PSU mounting area to bring wiring behind the motherboard tray or to route them up the unique tunnel designed in to the chassis. Additionally, In Win provided another hole above the CPU cooler access to route the 4/8 pin CPU AUX power lead. It’s hard to imagine any case in this price range having a more desirable cable management system than the one implemented here, great job In Win!
 |
 |
 |
 |
The inside rear area of the BUC 101 features a guide rail to easily position the PSU to its proper resting place. Along the bottom is a large mesh area for the PSU fan to draw air, and as previously mentioned there is a filter applied to this area as well. Moving up we come to the PCI expansion slot covers and the tool-less locking mechanisms. The locking mechanisms are easy to use and require only to be depressed and moved towards the outside of the case. One thing we really liked about these locks is the fact they do not cover the screw hole and still allow the user to secure an add on card with a screw should they desire to do so. Above the PCI expansion slots it the 120mm rear exhaust fan which like all the other fans in this case are black and non-LED.
The inside of the top panel doesn’t have a lot going on except for a view of the top panel fan from the bottom up.
 |
 |
 |
 |
The inside front of the case supports up to five 2.5 or 3.5 internal HDD’s, one 3.5 external drive and up to three 5.25 external drives. You may have noticed the inside of the case has four 5.25 drive bays, but the font panel only has a provision for using the top three. Apparently the bottom 5.25 bay is to be used for an internal drive of some sort. The HDD cage is not removable which should not be a problem as the case still supports video cards 11.8 inches in length. The HDD trays are made of plastic, one of which is marked “system” for easy identification of the HDD that houses your operating system.
 |
 |
 |
 |
Removing the front panel is quite easy by releasing three lock tabs on the left side and swinging it open and away from the frame. With the front panel removed we can see that the three 5.25 bay covers are protected with a foam filter to keep dust from entering the system. You can also have a good look at the front 120mm intake fan and filter assembly. As mentioned earlier, the front panel is easy to deal with as there is nothing hard wired to it, all the wiring is incorporated into the main frame.
Removing the right side panel affords another look at the large CPU access hole and the smaller hole to route the CPU AUX power lead. You can also see the wire management holes at the bottom portion as well as the cable channel running in a vertical direction.
 |
 |
 |
 |
 |
|
Concluding the interior tour will be a quick run down on installing a drive into the In Win BUC 101. To install a 3.5 or 2.5 HDD you just slide out a hard drive tray and use the provided rubber washers and screws to attach the drive to the tray. Below is a standard 3.5 HDD installed into one of the trays but there are holes in these trays to accept 2.5 drives as well.. Once the drive is secured, simply slide the tray back into the cage until it locks in place.
 |
 |
 |
|
Installing a drive into the 5.25 bays could not be any easier. All that needs to be done is pull the button knobs outward, slide the drive in and then push the button knobs back in to secure the drive. It really is that simple and only takes seconds to accomplish. There is also provisions made to further secure the drives with screws should the user wish to do so.
 |
 |
 |
|
The In Win BUC 101 is priced at around $90.00 USD from online retailers, and at that price it is certainly one heck of a value. The long list of features seems to go on and on with this case. From the EZ-Swap SATA HDD mount, the terrific cable management, the ease of drive installation and the included three 120mm fans you really get a great bang for the “BUC” !!
There are many choices when looking at a case in the sub $100.00 price range, but seldom will you come across one with this many great features. If you are in the market for a great looking and feature packed case for your next build or upgrade, you simply must put the BUC 101 at or near the top of your list.
Pros
- Great looks and build quality
- EZ-Swap SATA HDD Connection
- Easy drive installation
- Great cable management features
- USB 3.0 Motherboard header connection
- Affordible price
- Three included 120mm fans
Cons
- Hard plastic feet
- Side panel latches a tad flimsy but functional
The In Win BUC has earned 9/10 and the accompanying Gold Award based on it’s impressive features at a great price point!


 Posted in


