|
First and foremost, why put your PC under water? (No, not literally.)
- Better temperatures.
- Higher clocks.
- Quieter running system.
- Good looks.
- Impress the ladies.
- If you're a lady, really impress the guys.
Whatever your motivation, you’ve come to the right place. You can accomplish all of those and then some.
Before you jump into water cooling, it’s always best to plan your water loop, from start to finish. By this, I mean from the ground up, starting with the most basic component…
The Case
If you haven’t purchased your case, this is the best place to start your water loop. Cases can be modified to accept water cooling, but it’s much easier to have one ready from the start. There are two basic options available to you.
1. The case with holes for tubing (to reach the radiator).
Common Properties
- These cases are pretty standard cases, usually mid-tower ATX or larger.
- They have generally two holes for up to 5/8" OD (Outer Diameter) tubing (some accommodate up to 7/16” OD).
- The entire water loop can generally be contained within the case except for the aforementioned radiator. Some may require some inventive placement of, say, the pump & reservoir, but as a rule, all will fit inside except the radiator.
- Full-tower ATX form factor cases can often fit a single radiator and also contain holes to reach; installation is your option there.
- Mid-tower ATX form factor cases can sometimes fit a radiator on the inside, but it has to be on the larger end of that spectrum and the vast majority of the time they require heavy modding.
Pros
- Readily available
- Broad range of brands.
- Broad range of products.
- Priced from relatively inexpensive to as high as you want.
Cons
- Most don’t fit an entire water loop inside.
- No customization to order…what you see is what you get.
- The majority require modification to accommodate full loops (mostly for the radiator).
2. The case made specifically for water cooling enthusiasts. In this case, the common properties are equal to the Pros.
Pros
- Made to order.
- You decide what they look like.
- You decide the amount of cooling they can accommodate (think multiple radiators).
- To a degree, each one is “original.”
Cons
- Price, price, price. These have a very high upper limit to their cost and don’t start low.
- Size…they start big, can get REALLY big and go up from there.
- Lack of choice. There are very few sellers of such cases.
The most popular place to get these beasts is Mountain Mods. There are others, yes, but none mass-produce cases like Mountain Mods. The alternatives are generally design-to-order cases, such as Protocase. They even give you 3D CAD software to design your own case! You can also have a known case builder design and build one for you. Navig is a well known case designer and does excellent work. Here is his most recent creation: The Navig Exoframe. Beautifully crafted and peerless! There are others like him, but they are even more rare than actual businesses that do this.
Now that you have a home for it, we'll move on to the water loop itself. First, we'll go over the parts and then we'll get to assembly, testing and use later.
Before going on, as you go through this guide, there will be links to various products. This guide is by no means endorsing these products, it is just listing them as examples. There are a plethora of water cooling parts available out there; the ones listed are just a few of the more common choices. There are also small images of them to give you an idea of what they look like. With the exception of the barbs, To see larger images, just click on the image you'd like to enlarge.
The Reservoir
I decided to start at the beginning...where you put the fluid into the loop. There are five basic options for a reservoir:
|
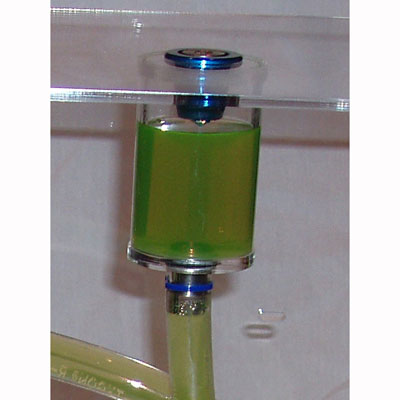
Separate Reservoir
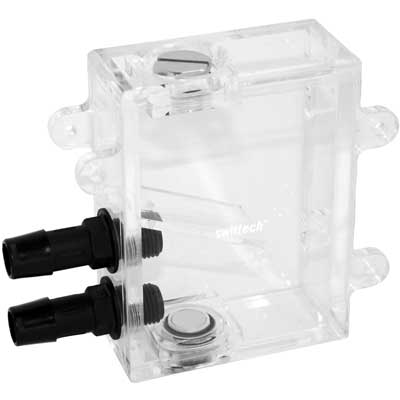
|
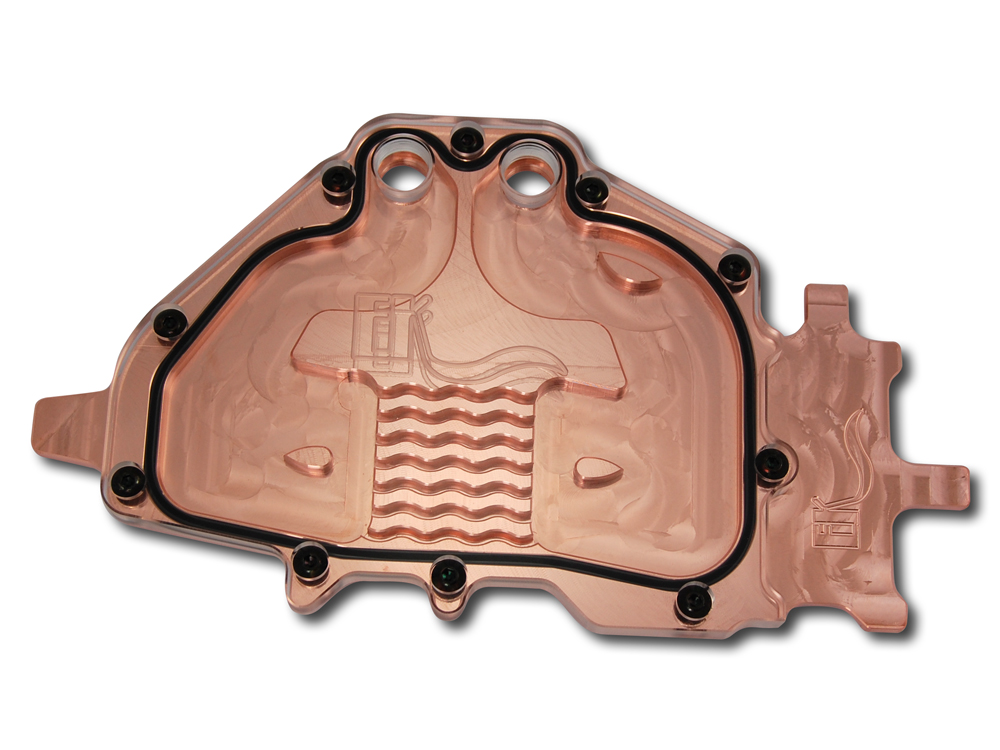
Reservoir Top
|
Built Into Radiator
|
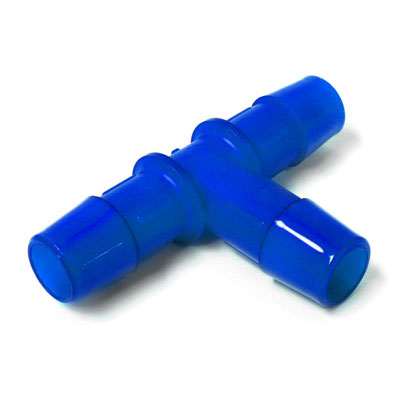
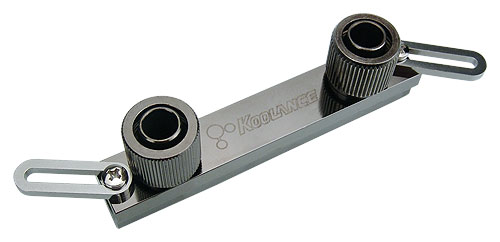
|
T-Insert for Tubing
|
Fillport
|
T-line Reservoir
|
The types of reservoir listed are all available, but the examples listed are by no means exhaustive. There are many options available to you. These are just examples of popular products fitting the description.
The only "rule" for a reservoir is that it come before the pump. This is so the pump will always be supplied with fluid. A dry pump is a dead pump. Another purpose reservoirs serve is to both fill and bleed the system. Bleeding a system removes the air bubbles that inevitably form as a result of filling the system.
Reservoir choice is completely personal and will depend on several factors, such as options for res location within your case, whether or not you want the ease of a res built into the pump, whether you want a res at all (t-line) and last but not least, purely aesthetic concerns.
The Pump
Next in your loop is the water pump. There are a decent amount of options out there, but for the vast majority of people, there are four options to choose from (to keep from confusing people - Swiftech pumps are just re-branded Liang pumps for US consumers):
|
MCP350/355
|
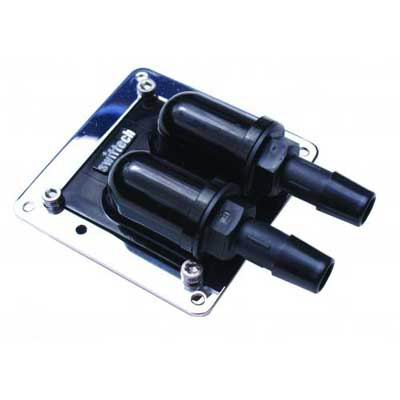
MCP655/655 Vario
|
Most that go with the DDC1 / DDC1+ (MCP350 / 355) go with a modified pump top, primarily because the original pump top comes with a molded plastic top that has barbs to accommodate 3/8" ID (Inner Diameter) tubing on it. As a lot of people prefer 1/2" or 7/16" ID tubing, an aftermarket top will help with that. Additionally, most tops will give you better Lph flow, as evidenced by this very excellent comparison.
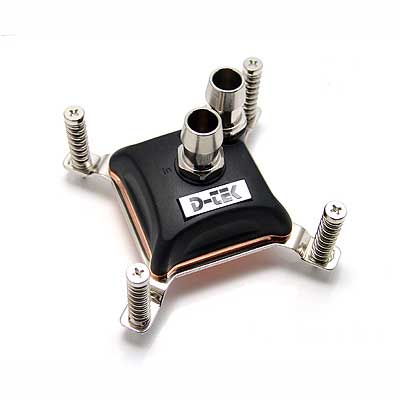
There are several other options out there, but these are the de facto standard. In the spirit of being comprehensive and for those on a very tight budget, one inexpensive alternative is the D-Tek DB-1. Not to leave anything out, there are also pumps available that will plug straight into a wall socket; however, the good ones tend to be prohibitively expensive and they'll get no play here.
One brand to stay away from is Thermaltake. To use a term Gilgamesh likes, their product is pants. Whatever that means, as long as it's negative, it's accurate!
The simplest combo of both of the above, and what's in my system, is the Laing DDC1+ / MCP 355 combined with the XSPC Res top. Per that roundup above, the res top gives you a pressure increase as well as serves your reservoir needs, all in one fell swoop. You also can't get get the liquid any closer to the pump than having the res mounted on top of it.
Truth be told, any of these pumps will serve most water loops with a block or three in it. If running a high restriction loop, counterintuitively, the MCP355 would be the way to go as long as you went with a quality aftermarket top. See this graph on the D5 vs this one for the DDC. You'll notice that per-gallon/hour, the DDC with a good aftermarket top gives more PSI than the D5. Now, if your loop is not restrictive and you want to move mass amounts of water, the D5 is the choice for you.
Moving along...
Water Blocks
Water blocks. There are a lot of these out there. I'll round up a few CPU blocks, mention a couple blocks for other stuff and move on. For specific recommendations, just ask away in the water cooling section.
CPU Blocks
High Flow Blocks
(These do not restrict flow as much as the alternatives. High Flow is best when planning on a multiple-block loop.)
High flow / low restriction blocks tend to be better for multiple block loops.
Low Flow Blocks
(These are a somewhat more restrictive, meaning it takes more pressure to push the water through them.)
- Swiftech Apogee GTZ - While listed as a low flow block, this one is the least restrictive of the low flow blocks. It's approximately 17% more restrictive than the Fuzion v.2 (source), which is why it made this chart. Of the low flows, this is the one that has potential in a multiple block system.
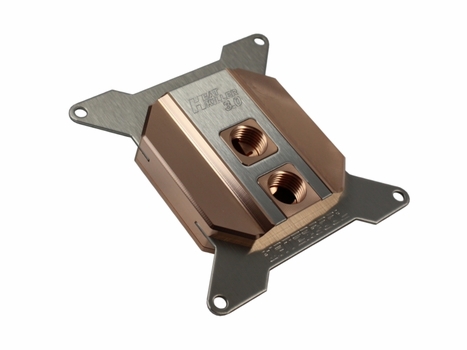
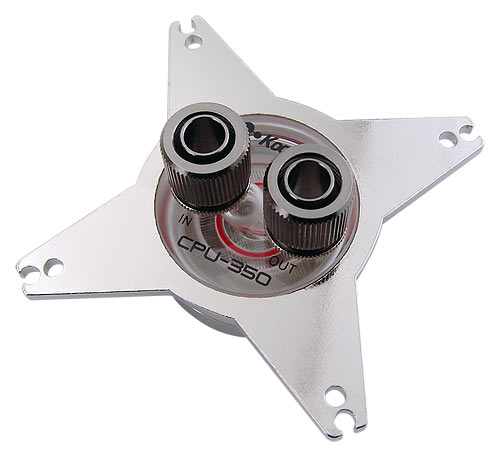
- Koolance CPU-350
- EK Supreme
As they tend to be more restrictive, these blocks may be best used in their own loop without other blocks taking pressure away. In theory, what you get out of that is better temps, of course in exchange for a CPU only loop, or a multiple loop system if you want to cool more than just the CPU with water (leading to increased cost).
|
Heat Killer 3.0
|
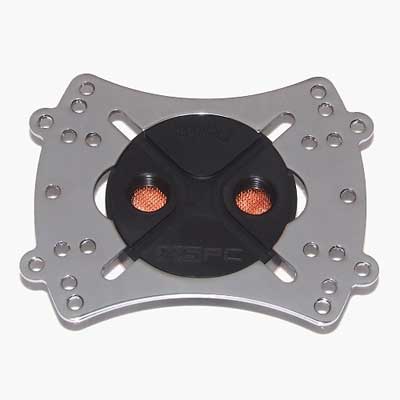
Fuzion v.2
|
X20 Delta V3
|
|
Apogee GTZ

|
CPU-350
|
Supreme
|
Quick-hit flow data obtained from this chart at the dearly departed (apparently) Martin's Liquid Lab.
That's a basic overview of popular CPU blocks. But why stop there? There are water blocks for almost everything. While being completely and utterly pointless (at least IMHO), there are even water blocks for RAM and HDDs. Do not waste your money.
Chipset / MOSFET Blocks
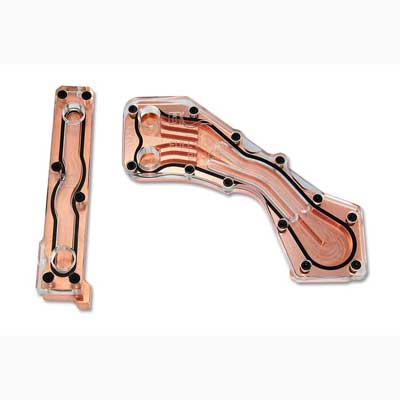
For chipset cooling, you have the option of a universal block or a block specially made for your board. Not all boards have that option. Here is a universal EK NB/SB block, pulled out of the hat. There are several universal options available to you, choose whichever you like. Any of them from known manufacturers will do better than the usually passive air cooling on most boards.
Here is an example of one of the blocks specially made for an ASUS Rampage II Extreme. There are a couple manufacturers that produce these for various boards. They are by no means exhaustive and the recent generation seems to be mostly for ASUS and for EVGA boards. More than likely, universal will be the way to go if you wish to cool your chipset(s).
Most southbridges do not get hot enough to warrant water cooling, so there really isn't any need to add an additional block if there isn't a specialty block available for your particular board. We've found that the X58 SBs do get a bit warm, at least on DFI boards, but adding a 40mm fan should fix that problem without having to go to the expense of a water block addition.
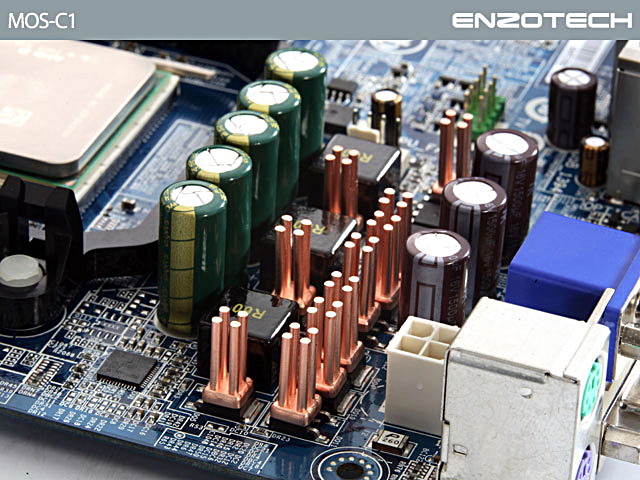
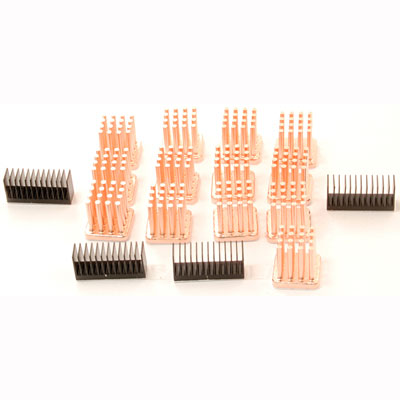
There is a rather substantial drawback to using a chipset block. Most MB manufacturers these days use a heatpipe solution on at least the NB & MOSFETs. This means the stock air cooling solution are linked and inseparable. Unfortunately, if you put a water block on your chipset, it will leave the power section bare, with nothing to dissipate the heat! Thankfully, they make these little copper one-per-MOSFET heat sinks to help with that problem. As long as you have good case airflow in the area, these should be plenty to dissipate the heat put out by your MOSFETs.
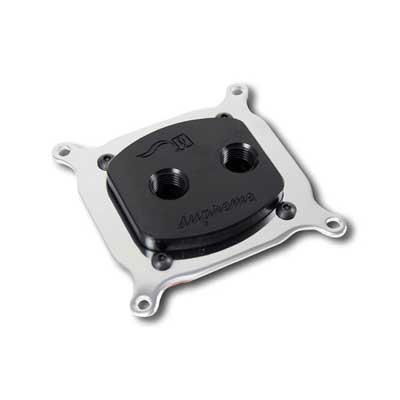
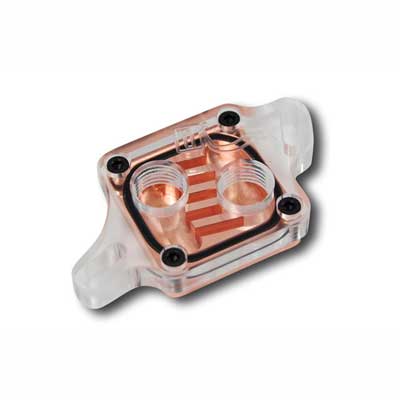
There are also universal MOSFET blocks that will work on a good number of boards. Here is one from Koolance. You may need to buy a heat plate to mount on its base for proper contact on all the MOSFETs.
Bear in mind, this is nowhere near as "universal" as the NB/SB blocks referenced above. There are quite a few MOSFET configurations on various manufacturer's boards, some of which will not be able to work with a universal block. For instance, my Biostar TPower I45's power section is too wide for any MOSFET block out there. Just measure your MOSFET configuration carefully and order appropriately.
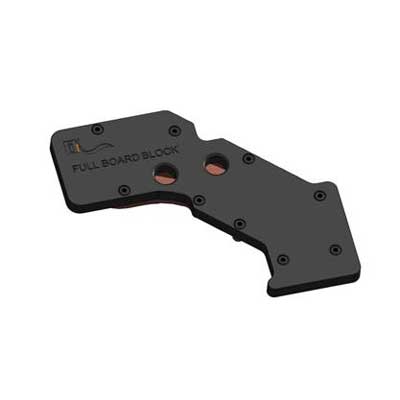
Just like NB/SB blocks, there are tailor-made MOSFET blocks available as well. Here is a combo kit for an EVGA X58 board.
|
EK Universal Chipset
|
Rampage NB/SB
|
Enzotech MOSFET
|
|
Koolance MOSFET
|
|
EVGA Combo Kit
|
One last note - just remember that chipset blocks and MOSFET blocks especially will increase the overall temperature in your water loop. You can compensate for this with a larger radiator, but the more components you have to cool, the warmer your water will get. With most setups, unless you are pushing very high clocks for long periods, the stock air solution is more than adequate and the addition of these blocks is purely for the 'bling' factor.
That said, their addition will definitely improve your temperatures and arguably the longevity of your equipment. If you want to use them, those are your options.
GPU Blocks
This is the last category of water block we'll go into here. Like chipset & MOSFET blocks, there are two options: the universal block and the full coverage block, customized for your specific GPU.
A common GPU block is the Swiftech MCW60. It will fit on a variety of GPUs on the market. If it doesn't fit, there is always the possibility of an adapter kit to make it fit. Barring that, one can always get inventive with their mounting, though that will take a bit more work. The benefit to a universal GPU block is that it will probably work on other cards when you upgrade. This is great, but as usual, there is a drawback.
GPUs are basically little computers, complete with their own processor, RAM, power section & chipset. These other items also need to be cooled. This can be accomplished in a few ways. The easiest is to purchase a heat sink kit for your specific card, if there is one, such as this kit for the 8800 series nVidia cards. If there is no kit available, there is always the option of buying the parts separately, using items such as the Swiftech VGA RAMsinks (also used on the chipset and applied via thermal tape) and MOSFET-sinks. If those MOSFET sinks don't work for your card, you can use the same little individual MOSFET sinks listed previously.
Also like the previously mentioned MOSFET cooling, using any of these will require good airflow through your case to keep the rest of the GPU cool. Since you'll be air-cooling your RAM, southbridge, board MOSFETs and HDDs anyway, good airflow is already a must and having these air cooled shouldn't present much additional heat into the case.
The other option for GPU water cooling are full coverage water blocks. These blocks look great and cool the entire card, not just the GPU. There are several manufacturers of these types of blocks and several GPU options to choose from. Here is an example for an nVidia 280GTX.
The problem with full coverage blocks is that they are not made for all GPUs and even if they are made for your GPU, it generally must be the reference nVidia / ATI design for it to mount properly. As there are GPU distributors that make their own PCBs, this can be an issue. Always verify the PCB is compatible with the specialized GPU block prior to purchase. This applies to the universal blocks as well; always verify the block will fit before purchasing to save yourself a headache and potentially lost money.
|
MCW60
|
8800 Kit
|
RAM Sink
|
|
Enzotech MOSFET
|
|
GTX280 Full Coverage
|
When considering a GPU block, always remember that GPUs run pretty hot. Adding one to a single loop will certainly increase the temperature within the loop. To compensate, you'll either need more radiator (or additional radiators) to dissipate the additional heat or you could run multiple loops. The drawback to that of course is you'll need two of everything.
It is certainly feasible to run a CPU, single GPU and chipset in one loop (I do it myself). Just understand your temperatures won't be as good as if they were completely separate. Provided you get a radiator sufficient to dissipate the heat properly, the temperatures will still be better than air cooling, sometimes significantly.
If you want to add multiple GPUs in SLI or Crossfire configurations, MOSFET cooling and/or potentially a SB block to the loop, I'd strongly suggest using multiple loops.
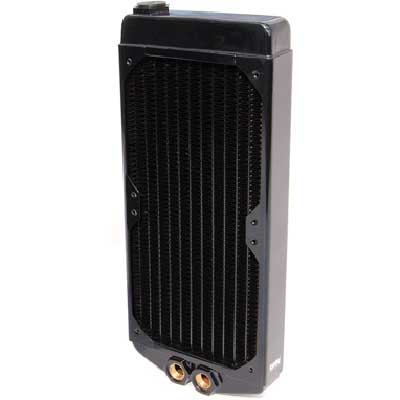
Radiators
There is definitely no shortage of radiators on the market. They are as small as a single 120mm radiator (made to accommodate one 120mm fan, often notated 120.1 or simply 120) or as big as a quadruple 140mm radiator (yes, that's four 140mm fans!, which would be 140.4 or 560 with alternative notations). Opinions on radiators are as numerous as there are radiator choices. Rather than say what brand is better than another, I'm simply going to layout some facts that are basically indisputable:
- Thermochill makes great radiators. They have recently been sold to Watercooling.uk, so it is unknown how that will play out. If they retain current production techniques, they will continue to be great radiators.
- XSPC is also an excellent choice.
- Swiftech radiators are one of the most popular options. Their prices are generally lower than other alternatives. They recently put out "stackable" radiators, where you can put two radiators surrounding a bank of fans.
- Black Ice radiators are good, but with their high fin count they need more air pressure than most other brands. This means you'll need higher CFM fans than you otherwise would, which leads to more noise. If silence is your main requirement, you might want to look elsewhere. This is not to say high fin density radiators are bad by any means; the right ones can even be better than their low fin density counterparts.
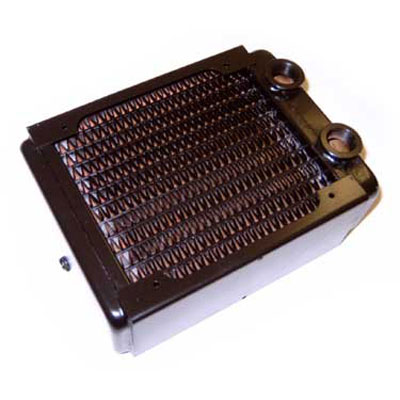
|
120.1 Radiator
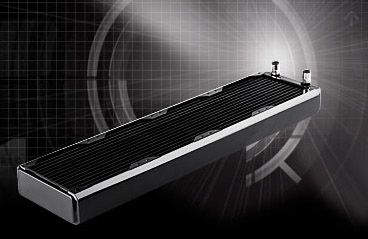
|
140.4 Radiator
|
So, how much radiator do you need? Well, that depends on what you're running. If a non- i7 CPU only loop, you could probably get away with a quality 120.1. If you plan on running an Intel i7 CPU in its own loop, a 120.2 could probably take care of that heatload. Add anything else to either of those setups, and you'll need more radiator!
My personal quick and dirty rule of thumb (and this will probably be disputed) when using high quality radiators (that is important) is to use a 120.1-per-block within reason. So, if you're running say an Intel Core2Duo, a NB block and a single GPU, a quality 120.3 would give you decent temps. Adding an i7 into the mix adds a significant amount of heat, as they run very hot. I'd give it its own 120.2, so if running an i7, NB block and single GPU, use at least a 120.4. Of course, there is nothing to say you have to use only one radiator. Instead of that 120.4, you could use two 120.2's or even two 120.3's. That's the beauty of water cooling; it's infinitely customizable!
Now, with that said, when it comes to radiators more is always better within reason. To give you better temps with some more breathing room, give yourself an extra 120.1 in addition to that rule. The more the merrier! Just keep in mind that, as with all components, radiators can be restrictive and lessen the flow of water through your system. Most pumps DDC1+ and better can handle at least two radiators. Any more and you should strongly consider the restrictive properties of your radiator choice. Per this excellent comparison, there can be a large discrepancy in the amount of flow restricted, between 6% and 17% in that comparison. I won't delve into the numbers here (this is a beginner's guide after all), just something to keep in the back of your mind when choosing your radiator(s).
I had mentioned silent running before. If you plan on water cooling in order to quiet down your computer (a common reason people switch to water, usually second only to temps), you'll need more radiator. Fans dissipate the heat by blowing cool air across the radiator fins. Generally, the more cool air, the cooler the fins. To maintain relative quiet, fans must run slower, meaning less air is blowing across the fins. To maintain the same cooling capability, you need more fins, which means you need more radiator. What that does NOT mean is that you need more fins per inch. More fin density restricts air flow. To run high fin density radiators, you need strong fans, which are generally louder.
To get even BETTER temps, you can run more than one water loop. If running SLI/Crossfire setups, multiple loops are strongly recommended. As long as the GPU(s) is(are) on one loop and the CPU is on another, the rest of the blocks can be dispersed at will. IMHO, the MOSFETs should be on the same loop as the GPUs and the NB/SB should be on that of the CPU. If opting not to run MOSFET blocks and still going with multiple loops, I'd isolate the CPU in its own loop and put the GPU(s) and NB/SB on their own loop. Like I said, infinitely customizable!
To make matters even more complicated, you don't absolutely have to use a radiator designed specifically for water cooling PCs. You can also use heater cores from cars or, if you're really ambitious, the actual engine radiator from a car! I won't go into much detail on that here. There are a lot of resources to modify those or even purchase them pre-modded around the 'net. If you're interested, just do some searching or ask here in our forums.
I'll only touch on fans, as there are a LOT of them. There are fans for almost every taste. There are high-, medium- and low-speed fans. There are loud and quiet fans. There are expensive and cheap fans. There are fans that combine any number of those qualities with each other. A common fan choice in water cooling, for their quality relative to their price, are Yate Loon fans. Cheap and good for their price. There are many fans more expensive that aren't as good as a Yate. Alternatively, on the other end of the spectrum, you have extremely high quality fans. These tend to cost at least 3x what a comparable Yate Loon does. The generally accepted "best" fans for quality and longevity are Panaflo and Delta. Personally, I use Ultra High Speed Panaflos, 114CFM, 2700RPM beasts. It's overkill and I rarely turn them up, but they are there on my fan controller when I bench and really need them. Do your research on fans, it will serve you well. If you want recommendations, don't hesitate to ask in our forums.
Tubing & Fittings
Tubing
Tubing is a very personal choice for several reasons, not the least of which is that it's available in several colors. There are also a few sizes available, all rated by the ID (Inner Diameter) of the tubing. These are:
- 1/4" / 6.35mm
- 5/16" / 8.0mm
- 3/8" / 9.6mm
- 7/16" / 11.1mm
- 1/2" / 12.7mm
1/4" & 5/16" are all but extinct at this point. There is still equipment available that uses them, but it's mostly to fix old loops. The vast majority of water loops in use on recent systems use 3/8" or larger tubing.
The good part is that your choice of 3/8", 7/16" or 1/2" is not too hard...choose whichever you like! There is very little difference in flow rates, even though there is a relatively large difference in size. An excellent comparison of the difference between the three (and the older two as well) is available here at OCForums, if you're interested.
Now that diameter is out of the way, let’s talk quality. Tubing is generally sold by the foot in the US or by the metre in the UK. You can get cheap tubing from your local hardware store for pennies (around $.33/ft for 1/2" ID) up to the top dollar laboratory-grade Tygon tubing (about $3.99/ft for 1/2" ID).
The difference in tubing quality will be borne out in its routing. The cheap tubing will easily kink when routing it between various components. If there is a lot of room between components for gradual curves, then it will do ok for you. If you are tightly constrained, as most computer cases are, you’re going to want to go with a better selection. Good tubing is very flexible and does not easily kink.
If you still have a problem with kinking or anticipate one, you can get anti-kink coils to go around your tubing and assist with that problem.
Honestly, I cannot fathom why it is necessary to spend $4/ft on any piece of plastic tubing. Middle-of-the-line but still excellent 7/16” XSPC tubing is fine with me; here’s a nice example for £1.99/m (that is a steal from Specialtech!) or $1.99/ft in the US.
Fittings
There are lots of fittings out there to choose from, for almost any application you could think of. Before getting into that though, let's talk about what fittings screw into. The industry standard threading is BSPP G1/4" thread, also denoted "G1/4" (BSPP stands for British Standard Parallel Pipe). This is referring to the threaded inputs/outputs of your block(s), radiator(s) and reservoir(s). Almost everything uses G1/4 at this point.
The only thing you need to be worried about is if something does NOT use G1/4. In that case, you'll need to investigate what it does use and try to find barbs that accommodate the specific threading. One of the most notable exceptions to the rule are Thermochill radiators, which use BSPP G3/8" threads. There is also threading denoted BSPT (British Standard Parallel Taper; these use the letter R, i.e. BSPT R1/4") and NPT (National Pipe Thread Tapered; generally denoted 1/4 NPT). This is just something to keep a watchful eye on; simply peruse specs before purchases and make sure your fittings match the threading on your equipment.
At the most basic level, there are two types of fittings:
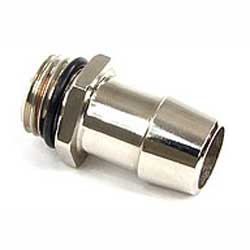
- Straight Barbs. These are just what they sound like. Straight tubes screwed into your equipment with a barb on the end. You simply push the tubing over the end to install it. Most people use a type of clamp on the end, either metal worm drive clamps or nylon hose clamps (sometimes called "Herbie clips"). The use of clamps is very highly recommended when using straight barbs. Do not trust that the tubing is tight enough. It will leak eventually.
- Compression Fittings. These need no clamps because they come with their own. While more expensive, they tend to look a bit nicer and could be considered "easier" due to their install. You slide the screw portion over the tubing, push the tubing onto the fitting and then screw the clamp down straight to the fitting. The drawback is they can be twice as expensive as the standard barbs (and then some).
|
Straight Barb
|
Compression
|
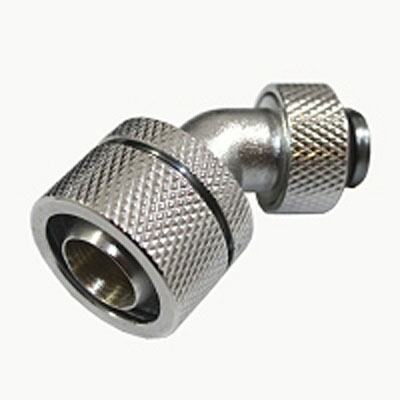
Angled Rotary
|
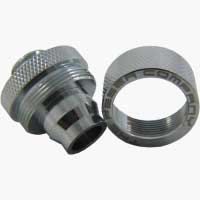
Perfect Seal
|
Generally, the majority of users go with barbs because of their reduced cost. If you really want cheap, you can even get molded plastic fittings, but I'd stick with metal.
The drawback to barbs is that most come straight off the water cooling equipment with a few 90 degree barb options out there. Sometimes an angled approach is necessary due to space constraints or to get the look you're trying to achieve. This can be accomplished by an angled fitting. Here's an example of the best of both worlds - angled rotary compression fitting (the tubing connection is at an angle and the fitting rotates to the direction you need). Here's a whole page of rotary & compression fittings to give you an idea of just some of the options available to you.
As a side note, there is one exception to the rule that you must use clamps with barbs. This is using 7/16"ID tubing on perfect seal 1/2" barbs. This will require soaking the end of your tubing in hot water to loosen it up prior to putting it on and will most likely require the use of a razor to remove. I hesitate to include this because I'm not personally comfortable using even these without clamps, but if space is really tight, it is a viable option. I take zero responsibility for wet equipment.
Fluid
Water. It has a higher specific heat capacity than any other common substance (source). That's why we use it; it's the best...plus it's cheap! There are only a couple hard and fast rules that must be followed though.
- Use distilled water. Nothing else.
- Tap water would breed algae and the junk in it would aid in gunking up your parts.
- I've seen it reported that deionized water would pick up stray ions from your parts and lead to corrosion. This is questionable however, considering IBM uses it.
- A big difference between deionized and distilled is that deionization only removes the minerals; distilling removes minerals and biological components.
- I personally use distilled only, but it's up to you. There is NO dispute however that you should never, ever use tap water.
- Use some type of biocide.
- One of the most popular options is PT Nuke. There are two versions of PT Nuke. One is for pre-mixed fluids and dyes. The other is for straight distilled water. PT Nuke is simple to use, inexpensive and works very well.
- Another option is a silver kill coil. These are relatively new and very neat. Supposedly pure silver serves as a great biocide without adding anything to the water itself. I'd love to try one of these sometime.
There are other things you can put in / combine with distilled water. Ethylene glycol (antifreeze) is a common one. I've also seen diluted methanol used (windshield washer fluid), though that one is slightly flammable and I'd not use it personally.
Ethylene Glycol / Antifreeze is really only necessary in two situations. The fist is if you plan on cooling your loop below freezing temperature (i.e. submersing your radiator in cold water and/or putting it outside a window in winter.) The second is for mixed-metal loops.
Quick note on loop components since we're talking about fuid compensating for it - Don't use more than one metal in your loop if at all possible as it will lead to corrosion inside your loop. The most common mixture is aluminum with copper. Most blocks are copper but some have aluminum tops. There are also aluminium radiators. The best thing you can do is just stay away from mixing metals.
What NOT to use, at least in my opinion: dye. Sure, it looks good and can make your liquid glow with a black light. The drawback I've seen multiple times is that it will eventually clog up your blocks, causing your temps to go up and causing you to tear your loop down, drain it and clean the inside of your blocks regularly. If you want your loop to glow, get UV-reactive tubing. Stay away from the dye; it does not help temps and will eventually lead to a headache down the road. Same goes with pre-mixed, dyed fluid.
One last thing and we're done with fluid. Don't be fooled by pre-made fluids claiming to be non-conductive. Even if their claim is true, that property will wear off over time and it will become just as conductive as the next fluid.
Assembly and Testing
Like I mentioned long ago in the Cases section, planning is essential. Before cutting up your (potentially expensive) tubing, plan how you want to run your loop from start to finish. Within reason, tubing length itself will not adversely affect the overall flow of the system. It does affect it though and every little bit counts. Basically, you want the shortest length of tubing from beginning to end for your particular application. If you don’t use any extraneous tubing, you’ll also save money and have some for use later.
What is the shortest length? That depends on your setup and what components you’re cooling. Plan, cut and install just enough tubing to get from barb A to barb B without any kinking. The only extremely important, non-negotiable rule is to have the reservoir before the pump as stated previously. You must always keep the pump supplied with fluid. Remember – a dry pump is a dead pump.
Aside from that, for all intents and purposes, the order of components in a water loop does not matter. There is one generally accepted convention: Pump out -> Radiatior -> CPU. This will allow the radiator to dissipate the miniscule amount of heat put into the loop by pump operation prior to it reaching the blocks. Even this rule is not set in stone.
When running a water loop, temperatures will generally be within a few degrees of the hottest component in the loop. This is perfectly logical. The water will eventually heat up to a certain point due to the warmest component. Once it heats up to that point, it will continue transferring that temperature water indefinitely.
The benefit to this is that there are much smaller temperature deltas (the difference between idle and loaded temperatures) with a water loop, barring very high chip voltages. Even with very high chip voltages, the delta will remain smaller than air cooling. So while your idle temperature may be a bit higher if, say, you put a GPU in the same loop as a CPU, the loaded temperatures will be better…and loaded temperatures are the ones that count.
Before jumping in with installation, you have some preparation to do. In order to get comfortable with their installation, cut a 3" piece of tubing and learn how to put it on a barb and clamp it. Better now than when it's in the PC. Exercise the clamps; open, close them a few times to make them smoother. For barbs, tighten down to finger tight and 1/4 to 1/2 turn more. Do not over tighten with a wrench; the o-ring can bulge and cause a leak.
Radiator preparation is one of the most missed items. Boil sink water and let it cool 5 min. Pour into the radiator, filling it up and let it sit 10 minutes. Drain half of the water or so and shake it till your arms hurt…3-4 min like a crazy person. Drain into a clear container. Do the radiator dance again and again till the water coming out is clear and there is no gunk once the water settles. Then do it two more times. NOW and only now is your radiator 90% clean. No worries, the last 10% will come out in the next year or two when you redo your loop for maintenance.
Inspect your parts. Open the pump, look for gunk / packing material. Run sink water through the blocks, pump, hose. Drain as well as you can, but don't go crazy on draining every last drop. Inspect bottom of block. Don't forget to remove the plastic cover!! Inspect screws and holes, check they go together well first. Seen more than one bad screw broken in a bracket. Your radiator screws might also not work perfectly. DON’T put a screw through the radiator, seen this done more than once.
Install blocks on parts. Take it slow, even remove to check TIM contact if you want. Install hose. Measure twice, cut once; make it a bit longer if you’re worried, you can always cut it shorter. Dry mount everything, and inspect all clamps etc. Take a walk, watch a movie. Then inspect it again.
After that is done, it’s time to fill the system and test for leaks. DO NOT fill the system and turn the PC on. You want to make darn sure there aren’t any leaks before putting electricity through the parts on which the water loop is mounted.
Before proceeding, put paper towels (or the absorbent material of your choice) underneath every potential leak point in the loop installed in/onto/near electrical components. This includes not only the tubing & barbs, but the blocks themselves.
In order to fill the system and test for leaks, you’ll need to either disconnect your power supply from the system or use another PSU to power the pump. I have an older spare PSU that isn’t viable for any modern systems but will still put out plenty of power to spin the pump up. To turn a power supply on without having it connected to a PC, simply install a jumper (piece of wire) wire between the green and black wires on the 20/24-pin main harness. Here is a pictorial example of how to do it. This may sound intimidating, but it’s really not. The only thing you’ll notice is the PSU fan turning on when you power it on via the main switch on its casing.
Now that you have power, turn the PSU off and plug it into your pump. Put fluid into the reservoir / t-line hose and let it reach the pump. Once you do that, power on the PSU. The pump will begin to push the fluid through the loop. When the fluid before the pump is exhausted, turn it off. DO NOT RUN THE PUMP DRY! Fill the res/t-line up again and repeat. Do this until the amount of fluid before the pump remains constant. That indicates the loop is filled.
If you get water/liquid all over the place, the parts need to be taken out (meaning Mobo, GPU etc), rinsed in alcohol, lightly scrubbed with a toothbrush, compressed air and if possible blow dried very, very well on LOW heat, then left to dry for at least 24 hours. Pay close attention to the PCI slots if they get full of liquid. Compressed air helps a lot to blow them out.
As you will surely notice, filling the loop generates a significant amount of bubbles within the loop. These are easily dissipated. Simply let the loop run. The bubbles will be expelled from the liquid when it gets back to your res / t-line. Keep an eye on it for the first little bit as expelling the bubbles will lower the fluid reserve (replacing it with air). You'll need to top off the fluid at least once, potentially more if you're using a t-line setup and then once again when all bubbles have been purged. Eventually the liquid will be bubble-free. Generally this occurs sometime within 24 hours. Most bubbles will come out relatively quickly, but there will be stragglers that will work their way out of the loop eventually. Once the vast majority (99.9%) of the bubbles are gone, you’re fine to go ahead and run the loop on the system while the remainder work their way out.
For testing purposes, it is necessary to run the filled loop for enough time to satisfy you there will be no leaks. This varies from person to person. If you’ve made it this far, you’re smart enough to know what is reasonable for you. I’ve heard anywhere from one hour to 24 hours.
The way I do it on a fresh system is to install all components the loop attaches to and the loop itself, then fill and run the loop while installing the remainder of the system. Since I’m a wire management freak, this can take a couple hours before I’m ready to power it up. If you’re not as thorough, or on an existing system, I would run it at least two to three hours before being confident the system is leak-free.
Alternatively, you can install the loop at night and run it overnight. In the morning, if there are no wet paper towels, you should be ok to give power to the system and turn it on. Bottom line – be reasonable. Your PC has a lot of expensive electronics in it and water + electricity is not a good combination. Test it for however long you need to feel certain there will be no leaks.
When you reach that certainty, congratulations, you now have a water cooled PC!
----------
Another helpful post is right here in our forums, dispelling water cooling myths.
Well, that does it. You now should have at least a basic grasp of the components for water cooling a PC and how they should be installed and operated. If you have any questions or suggestions for additions to this guide, feel free to post them in the cooling section of our forums!
Special thanks to Gilgamesh, Dostov from The Raptor Pit, Spawn-Inc and Conundrum from OCForums and alacheesu, faster3200 W1zzard, Waterlogged and MpG, all from XS for their valuable input. |


